2010年12月9日 星期四

git 同時開發範例

一開始有aaa與bbb目錄

git-test/
|-- aaa
`-- bbb


A用aaa當作程式放置的目錄, 先對他做初始化

cd git-test/aaa
git init


複製以前寫的某一隻程式至此目錄

git-test/
|-- aaa
| |-- main
| `-- main.c
`-- bbb


加入此目錄所有檔案給git管理

git add .

第一次commit

git commit
(之後可以輸入這次commit的註解)

發現有一個檔案是編譯出來的二進位檔, 不需要追蹤這個檔案

git rm main
git-test/
|-- aaa
| `-- main.c
`-- bbb

要習慣做完一個階段之後就commit

git commit -a

假設臨時需要用到之前被砍掉的main, 可以切換回去過去的狀態

先用git log看要回去的那次commit的編號
commit 93056170a2f98563ba13f1b4679a73655a64c2fb
Author: chihying
Date: Tue Feb 23 20:29:55 2010 +0800

remove output files


commit 3ecb40595863e67b5b6f5ea06b8e75dfcad85848

Author: chihying
Date: Tue Feb 23 20:28:26 2010 +0800

first add all files

切換回去一開始那次的commit, 整個資料夾就回復了

git checkout 3ecb40595863e67b5b6f5ea06b8e75dfcad85848

git-test/
|-- aaa
| |-- main
| `-- main.c
`-- bbb

新增了一個Makefile


git-test/
|-- aaa
| |-- Makefile
| `-- main.c
`-- bbb

加入管理git add Makefile

git commit


若目前有另外一個人B也要一起開發這個程式, 他的工作目錄在bbb

cd git-test/bbb
git clone [aaa的路徑]

這樣在B就也有一份程式了

bbb
`-- aaa
|-- Makefile
`-- main.c


假設目前A有對程式做修改,B想取得最新的更動

git pull

B要做一些修改, 先開一個branch

git branch B_modify
可用git branch查看
B_modify
* master

切換branch
git checkout B_modify
* B_modify
master

A B都修改/commit了一些東西之後,B要把他在B_modify的修改merge回去

先跳回master
git branch master
從aaa抓最新的修改
git pull ../../aaa
把B_modify的修改合併到master上面
git merge B_master
把更新上傳至aaa
git push

2010年12月5日 星期日

找尋程式中使用哪些define的flag做判斷

一般程式會在編譯時定義一些flag來決定是否啟動某功能的支援,
而在程式內的實作會使用ifdef XXX來判斷,

可以用以下的script找出所有用ifdef判斷的flag,
來確認所需的功能是否在編譯時有加入

1. 搜尋所有ifdef
2. 取得第二個欄位的資料
3. 排序(刪去重複)


grep -rns ifdef * | awk '{FS=" "} {print $2}' | sort -u

2010年11月28日 星期日

use ssh tunnel to connect

A: local machine, can access B
B: ssh server(windows can use openssh for ssh server)
C: A cannot access, but B can


in A, use:
ssh -NfL [A port]:[C IP]:[C port] [B id]@[B IP]

then in A machine you can use localhost:[A port] as [C IP]:[C port]


if B is not a ssh server but have ssh client
you can reverse ssh tunnel

in B, use:
ssh -NfR [A port]:[C IP]:[C port] [A id]@[A IP]

在ubuntu mount另一台ubuntu架的samba

sudo mount -t cifs //192.168.2.3/chihying /home/XXXX -o username=XXXX -o password=XXXX -o iocharset=utf8


原本使用 mount -t smbfs一直失敗
改用cifs就成功了

mount: wrong fs type, bad option, bad superblock on //192.168.2.3/chihying,
missing codepage or helper program, or other error
(for several filesystems (e.g. nfs, cifs) you might
need a /sbin/mount. helper program)
In some cases useful info is found in syslog - try
dmesg | tail or so


使用其他帳號開的分享,掛上去之後發現沒有寫入權限
解決方法: 加入 -o noperm
ex:
sudo mount -t cifs //192.168.2.3/chihying /home/XXXX -o username=XXXX -o password=XXXX -o iocharset=utf8 -o noperm

2010年11月21日 星期日

切換ubuntu java版本

編譯新版本的android時跳出須使用java 1.5, 不能使用1.6
所以需要做切換

我是使用
update-alternatives --all
一個個改成1.5,不過太麻煩


應該可以使用下面這種寫法吧.....
sudo update-java-alternatives --set java-1.5.0-sun


http://blog.dzasdever.net/2009/07/ubuntu-java.html

2010年11月11日 星期四

tar加上分割檔案

今天要把資料打包放到隨身碟上,
不過卻發現隨身碟為fat32,不支援單一大檔案,
所以google一下方便的分割方法

參考:
http://blog.24reader.com/vincentlam/2009/04/22/%E4%BD%BF%E7%94%A8tar%E6%89%93%E5%8C%85%E5%A3%93%E7%B8%AE%E4%B8%A6%E5%88%86%E5%89%B2%E7%82%BA%E5%9B%BA%E5%AE%9A%E5%A4%A7%E5%B0%8F%E7%9A%84%E6%AA%94%E6%A1%88/
http://lovejuan1314.javaeye.com/blog/457841


原本壓縮:
tar -zcvf XXXX.tar.gz XXXX

原本解壓縮:
tar -zxvf XXXX.tar.gz


壓縮並分割:
tar -zcvf- XXXX| split -a 1 -b 1000m - ./XXXX.tar.gz.
壓縮結果:
XXXX.tar.gz.a
XXXX.tar.gz.b
XXXX.tar.gz.c
...

解壓縮:
cat XXXX.tar.gz* | tar -zxvf-

2010年11月5日 星期五

android property

關於android property的一些介紹
http://blog.csdn.net/loughsky/archive/2008/11/14/3297286.aspx
http://owenhuangtw.pixnet.net/blog/post/24278564

start/stop android's service

今天在trace code時發現到程式裡面使用
property_set("ctl.start", XXXX);
來啟動某服務

服務應該是定義在init.rc內
service XXXX.....

可以手動開啟/關閉服務:
setprop ctl.start XXXX
setprop ctl.stop XXXX

下面連結有講到打開/關閉開機動畫的範例
http://blog.chinaunix.net/u3/90973/showart_2255578.html

2010年10月26日 星期二

算質數

感覺像是以前修課在寫作業


1 #include stdio.h
2 #include stdlib.h
3
4 void calculate(int max){
5 int *result = (int*) malloc(sizeof(int) * max);
6
7 result[0] = result[1] = 0;
8 result[2] = 1;
9
10 for(int i=3; i 11 if(i%2 == 0){
12 result[i] = 0;
13 }
14 else{
15 result[i] = 1;
16 }
17 }
18
19 for(int i=3; i*i<=max; i++){
20 if(result[i]==1){
21 for(int j=i+i; j 22 result[j] = 0;
23 }
24 }
25 }
26
27 for(int i=0; i 28 if(result[i] == 1){
29 printf("%3d ", i);
30 }
31 }
32
33 }
34
35
36 int main(){
37
38 calculate(100);
39
40 return 0;
41 }

calculate PI by rand()

使用機率計算半徑為1的四分之一圓
乘以四之後為一個圓
由於圓的面積為PI*r*r,此時r又是1
所以圓面積為PI

===============================
1 #include stdio.h
2 #include stdlib.h
3 #include math.h
4
5 void get_value(int sum){
6 double x,y;
7 double tmp;
8 int count = 0;
9 int i = 0;
10
11 srand(0);
12
13 do{
14 x = (double) rand()/RAND_MAX;
15 y = (double) rand()/RAND_MAX;
16
17 tmp = x*x + y*y;
18
19 if(sqrt(tmp)<=1){
20 count++;
21 }
22
23 }while(++i < sum);
24
25 printf("result: %lf \n", 4 *((double)count/sum));
26 return;
27 }
28
29 int main(){
30
31 get_value(10000000);
32
33 return 0;
34 }

c++ inheritance about constructor/destructor/override/virtual function

1 #include
2 using namespace std;
3
4 class A{
5 public:
6 A(){
7 cout << "1" << endl;
8 }
9
10 void func1(){
11 cout << "2" << endl;
12 }
13
14 virtual void func2(){
15 cout << "3" << endl;
16 }
17
18 ~A(){
19 cout << "4" << endl;
20 }
21
22
23 };
24
25 class B:A{
26 public:
27 B(){
28 cout << "5" << endl;
29 }
30
31 void func1(){
32 cout << "6" << endl;
33 }
34
35 virtual void func2(){
36 cout << "7" << endl;
37 }
38
39 ~B(){
40 cout << "8" << endl;
41 }
42
43 };

1 #include iostream
2 #include "my-header.h"
3
4 int main(void){
5
6 A *ptr;
7
8 B *my_B = new B();//1 5
9
10 ptr = (A*)my_B;
11
12 ptr->func1();//2
13 ptr->func2();//7
14
15 my_B->func1();//6
16 my_B->func2();//7
17
18 delete my_B;//8 4
19
20 return 0;
21 }

2010年10月20日 星期三

c++ operator overload

myClass.h
1 #include "myClass.h"
2
3 myClass operator+(myClass c, int i){
4 myClass tmp(c.value() + i);
5 return tmp;
6 }
7
8 myClass operator+(int i, myClass c){
9 myClass tmp(c.value() + i);
10 return tmp;
11 }
12
13 myClass operator-(myClass c, int i){
14 myClass tmp(c.value() - i);
15 return tmp;
16 }
17
18 myClass operator-(int i, myClass c){
19 myClass tmp(c.value() - i);
20 return tmp;
21 }
22
23 myClass operator++(myClass &c){
24 c.n++;
25 return c;
26 }
27
28 myClass operator++(myClass &c, int i){
29 myClass tmp(c.value());
30 c.n++;
31 return tmp;
32 }
33
34 myClass operator--(myClass &c){
35 c.n--;
36 return c;
37 }
38
39 myClass operator--(myClass &c, int i){
40 myClass tmp(c.value());
41 c.n--;
42 return tmp;
43 }


myClass.c
1 class myClass{
2 public:
3 myClass(){
4 n=0;
5 }
6
7 myClass(int in){
8 n = in;
9 }
10
11 myClass operator+(myClass c){//only for "myClass + myClass"
12 myClass tmp(n+c.value());
13 return tmp;
14 }
15
16 myClass operator-(myClass c){
17 myClass tmp(n-c.value());
18 return tmp;
19 }
20 /*
21 myClass& operator++(){//for ++myClass //& for reduce copy object?
22 n++;
23 return *this;//"this" is a pointer
24 }
25
26 myClass operator++(int i){//for myClass++
27 myClass tmp(n);
28 n++;
29 return tmp;
30 }
31
32 myClass& operator--(){
33 n--;
34 return *this;
35 }
36
37 myClass operator--(int){
38 myClass tmp(n);
39 n--;
40 return tmp;
41 }
42 */
43
44 friend myClass operator+(myClass c, int i); //for myClass + int
45
46 friend myClass operator+(int i, myClass c); //for int + myClass
47
48 friend myClass operator-(myClass c, int i);
49
50 friend myClass operator-(int i, myClass c);
51
52
53 friend myClass operator++(myClass &c);//for ++myClass
54
55 friend myClass operator++(myClass &c, int);//for myClass++
56
57 friend myClass operator--(myClass &c);//for --myClass
58
59 friend myClass operator--(myClass &c, int);//for myClass--
60
61 int value(){
62 return n;
63 }
64 private:
65 int n;
66 };

2010年10月19日 星期二

C++ called by reference

參考http://caterpillar.onlyfun.net/Gossip/CppGossip/PassBy.html


int main(){
int x = 10;
printf("%d\n", inc(x));
printf("%d\n", x);

return 0;
}

int inc(int n){
n = n+1;
return n;
}


若程式這樣寫,則印出來為:
11
10

因為n與x是不同的變數(called by value)
==============================================
int main(){
int x = 10;
printf("%d\n", inc(x));
printf("%d\n", x);

return 0;
}

int inc(int *n){
*n = *n+1;
return *n;
}

使用指標的方式輸出為:
11
11

========================================
int main(){
int x = 10;
printf("%d\n", inc(x));
printf("%d\n", x);

return 0;
}

int inc(int &n){
n = n+1;
return n;
}
若在function的參數中加上&,則代表int &n = x
(n為x的一個別名,改變n,x會一起變)

這樣輸出也是:
11
11


=========================================
若不准傳進function的參數遭到修改的話,可以使用const
int my_function(const int &in){
...
}


2010年10月18日 星期一

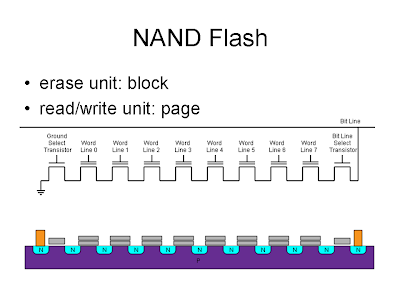
flash memory

裡面圖很多都是網路上抓的


linux kernel compile & install


2010年10月13日 星期三

compile cyanogenmod android by your self for Nexus One

There is a detail steps in cyanogenmod's wiki(Passion equals Nexus One?)
http://wiki.cyanogenmod.com/index.php?title=Compile_CyanogenMod_for_Passion

I follow instructions on that wiki, finally build a bootable ROM,
then I can modify every where interested!

currently have some problems(no IME, error in quick setting...)

2010年7月19日 星期一

電波錶

http://tw.alfaso.com/blog/radio_clock/300

原來電波錶是接收日本那邊發射的無線電波來校正時間,並不是接收衛星(gps)的訊號

如果有一個可以接收gps訊號的手錶,就可以接收gps衛星上面的原子鐘時間得到跟電波錶一樣準的時間
不過gps的耗電量應該很驚人....
而且gps要在室外才收得到訊號不夠實用

2010年7月15日 星期四

signal 與鍵盤的對應

SIGINT - CTRL-C (中斷字元)
SIGQUIT - CTRL-\ (關閉字元)
SIGTSTP - CTRL-Z (終端機停止訊號)

捕捉這些訊號就可以讓自己寫的終端機程式送出相對應的控制字元

ascii的前面幾個是控制字元
http://home.educities.edu.tw/wanker742126/asm/ap04.html

2010年7月9日 星期五

android apn 預設設定檔

若要修改預設的apn資訊...
  1. 直接修改裝置上的/etc/apns-conf.xml,刪除 ./data/com.android.providers.telephony/databases/telephony.db,並重新開機
  2. 編BSP時包進去需放在 mydroid/development/data/etc/apns-conf_sdk.xml(注意檔名),若放在 mydroid/out/product/.../system/etc 下重編時會被developement目錄的那個檔蓋掉!

2010年7月8日 星期四

簡易vim使用

study area有比較詳細的教學

命令模式時:
  • 基本操作
  1. 上 k
  2. 下 j
  3. 左 h
  4. 右 l
  5. 複製(行) yy(Y) 2yy(複製兩行) yG(複製到檔尾) y[xx]G(複製到xx行)
  6. 貼上 p
  7. 復原 u
  8. 尋找 /(往下) ?(往上) 可用n N移動到下一個
  9. 尋找游標處的字 *(往下) #(往上) 可用n N移動到下一個
  10. 移動游標 gg(檔頭) G(檔尾) :xx(到xx行)^(行首) $(行尾)
  11. 翻頁 ctrl-f(pageup) ctrl-b(pagedown)
  12. 重複上一個動作 .
  • 程式設計
  1. 找出此變數定義的地方 gd
  2. 找出與游標處配對的括號 %
  3. 到目前function開頭 [[
  4. 到下個function開頭 ]]


2010年6月23日 星期三

C alarm() - 系統經過特定時間之後發sigalarm給程式

http://publib.boulder.ibm.com/infocenter/iseries/v5r3/index.jsp?topic=/apis/sigalarm.htm

程式在做一些timeout的功能時用alarm()很方便!

syslog - 寫入資訊至系統的log

參考http://blog.csdn.net/yulanarti/archive/2007/09/13/1783839.aspx


#include
void openlog (char*ident,int option ,int facility);
void syslog(int priority,char*format,……)
void closelog();

2010年6月22日 星期二

在程式內執行系統指令並取得回結果

使用popen()

參考http://www.lix.polytechnique.fr/~liberti/public/computing/prog/c/C/FUNCTIONS/popen.html


FILE *popen(const char *command, const char *type);
執行某指令並把stdout的值放入檔案並回傳
若要取得stderr可以在指令後加上 "2>&1"

用完後要使用pclose()關閉檔案


example:

/*
* Purpose: Program to demonstrate the popen function.
*
* to do: Check that the 'popen' was successfull.
*
* Author: M J Leslie.
* Date: 08-Jan-94
*/

#include

main()
{
FILE *fp;
char line[130]; /* line of data from unix command*/

fp = popen("ls -l", "r"); /* Issue the command. */

/* Read a line */
while ( fgets( line, sizeof line, fp))
{
printf("%s", line);
}
pclose(fp);
}

2010年6月14日 星期一

ganttproject - 畫甘特圖的軟體

http://www.ganttproject.biz/

蠻簡單的甘特圖軟體,使用java寫的,檔案使用xml格式儲存


不過發現下載回來的版本中文字型顯示有問題,全部變半形
但是線上版本運作就正常,所以就直接抓線上運作的版本,在本地執行

/usr/lib/jvm/java-6-sun-1.6.0.20/bin/javaws -offline /home/xxxx/ganttproject-2.0.10.jnlp

2010年6月4日 星期五

使用蜂鳴器通知某指令完成

1.先寫一隻能夠使蜂鳴器發出聲音的程式

//b2.c
#include
#include

void play(unsigned int* freq, unsigned int* delay);

int main(int argc, char* argv[])
{
speaker(330, 5);
speaker( 0, 5);
speaker(330, 5);

return 0;
}

int speaker(unsigned int freq,unsigned int delay)
{ static int flag=0,bit;
if(flag==0)
{
flag=1;
iopl(3);
}
outb(0xb6,0x43);
outb((freq & 0xff),0x42);
outb((freq >> 8),0x42);
bit=inb(0x61);
outb(3 | bit,0x61);
usleep(10000*delay);
outb(0xfc | bit,0x61);
return;
}


2.beep:一個shell script使b2在指令完成時執行

$*
sudo ./b2


3.把b2 and beep放至/bin

4.由於b2發出聲音要有root的權限,所以b2擁有者要設為root,然後對beep作setuid
http://www.google.com/url?q=http%3A%2F%2Flinux.vbird.org%2Flinux_basic%2F0220filemanager.php%23suid&sa=D&sntz=1&usg=AFrqEzfx6HcqK_4BpogqAlU2s7Ts5ttsug

debug USB - use usbmon, usbfs


dump urb data

  1. 編kernel時,在driver/usb/下選擇usb monitor
  2. mount -t debugfs debugfs /sys/kernel/debug
  3. 之後在此目錄下就會看到usbmon目錄
  4. 可以在此dump出urb的資料(ascii)

  • 可以使用/dev/usbmon[XX]來dump出raw data,之後自己寫程式去parse
  • 詳細文件參考Documentation/usb/usbmon.txt

查看linux上所有USB裝置的詳細資訊


  1. mount -t usbfs usbfs /proc/bus/usb/
  2. cat /proc/bus/usb/devices
  3. 各攔位介紹
    1. http://www.linux-usb.org/USB-guide/c607.html
  4. 詳細文件: Documentation/usb/proc_usb_info.txt

/proc/bus/usb/devices各欄位資料

  • T開頭(topology)
    • Bus: which bus the device is on
    • Lev: the level of the device
      • level 00 for the root hub
      • level 01 for any device attached to the root hub
      • level 02 for devices attached to hubs at level 01, and so on.
    • Prnt: the parent device for this device
      • always 00 for the root hub
      • 01 for the devices attached to the root hub
    • Port: the port on the parent device
      • starting at 00 for the first port on each device.
      • Prnt/Port is unique per bus.
    • Cnt: what number device this is, based on the enumeration order within that level of the topology, starting at 01 for the first device.
    • Dev#: what number device this is, irrespective of level, based on the bus enumeration order. This is unique per bus
    • Spd: what speed this device is running at, in Mbps (either 1.5 or 12 with the current version of USB).
    • MxCh: how many devices can be connected to this device
      • 00 for anything except a hub.
    • Driver: which device driver is being used for this device
      • an entry of (none) indicates that no driver is being used.
  • D開頭(device descriptor)
    • Ver: which USB specification version the device claims to meet.
    • Cls: which device class the device is claiming to meet, in both hexadecimal and as a string.
      • A Cls entry of 00(>ifc) indicates that the device class specification compliance is interface dependent, and the interface descriptor should be read for device class information.
    • Sub: which sub-class (within the Cls entry), the device meets.
    • Prot: which protocol within a class or sub-class the device claims to meet.
    • MxPS: how big the packets from Endpoint 0 are.
    • #Cfgs: how many configurations this device has.
  • P開頭(pid/vid)
    • Vendor: the Vendor Identification code for the device
    • ProdID: the Product Identification code for the device.
    • Rev: the product revision number.
  • S開頭: vendor and product strings that the device returned.
  • C開頭(configuration descriptor)

    • the number of C:lines per device is given by #Cfgs, and the entry followed by an asterisk is the current configuration.

    • #If: how many interfaces the device has.

    • Cfg#: which configuration is being described.

    • Atr: hexadecimal indication of the device attributes

      • 0x80 for bus-powered

      • 0x40 for self-powered

      • 0x20 for remote wake-up capable

    • MxPwr: maximum power draw for this device configuration, in milliamps(mA).

  • I開頭(interface descriptor)

    • If#: which interface is being described within a given device configuration.

    • Alt: which alternate setting of this interface is being described.

    • #EPs: how many endpoints there are within the alternate setting for this endpoint.

    • Cls: which class the alternate setting of the interface corresponds to, in both hexadecimal and as a character string.

    • Sub: which sub-class the alternate setting of the interface belongs to.

    • Prot: which interface protocol (within a class and sub-class tuple) the alternate setting of the interface conforms to.

    • Driver: which of the various USB drivers has claimed this interface.

  • E開頭(endpoint descriptor)

    • Endpoint 0 is not displayed.

    • Ad: endpoint address, with a letter to indicate whether the endpoint is an In or Out endpoint.

    • Atr: the attribute (transfer type) associated with the endpoint, followed by a string translating the transfer type.

    • MxPS: maximum packet size this endpoint is capable of sending or receiving, as appropriate.

    • Ivl: the interval, in milliseconds, between polling of interrupt endpoints.

      • ignored for bulk and control transfers, and is set to 1 for isochronous transfers.


=================================================

example

root@ocgod-ubuntu9:/proc/bus/usb# cat devices

T: Bus=05 Lev=00 Prnt=00 Port=00 Cnt=00 Dev#= 1 Spd=12 MxCh= 2
B: Alloc= 0/900 us ( 0%), #Int= 0, #Iso= 0
D: Ver= 1.10 Cls=09(hub ) Sub=00 Prot=00 MxPS=64 #Cfgs= 1
P: Vendor=1d6b ProdID=0001 Rev= 2.06
S: Manufacturer=Linux 2.6.28-18-generic uhci_hcd
S: Product=UHCI Host Controller
S: SerialNumber=0000:00:10.3
C:* #Ifs= 1 Cfg#= 1 Atr=e0 MxPwr= 0mA
I:* If#= 0 Alt= 0 #EPs= 1 Cls=09(hub ) Sub=00 Prot=00 Driver=hub
E: Ad=81(I) Atr=03(Int.) MxPS= 2 Ivl=255ms

T: Bus=04 Lev=00 Prnt=00 Port=00 Cnt=00 Dev#= 1 Spd=12 MxCh= 2
B: Alloc= 0/900 us ( 0%), #Int= 0, #Iso= 0
D: Ver= 1.10 Cls=09(hub ) Sub=00 Prot=00 MxPS=64 #Cfgs= 1
P: Vendor=1d6b ProdID=0001 Rev= 2.06
S: Manufacturer=Linux 2.6.28-18-generic uhci_hcd
S: Product=UHCI Host Controller
S: SerialNumber=0000:00:10.2
C:* #Ifs= 1 Cfg#= 1 Atr=e0 MxPwr= 0mA
I:* If#= 0 Alt= 0 #EPs= 1 Cls=09(hub ) Sub=00 Prot=00 Driver=hub
E: Ad=81(I) Atr=03(Int.) MxPS= 2 Ivl=255ms

T: Bus=03 Lev=00 Prnt=00 Port=00 Cnt=00 Dev#= 1 Spd=12 MxCh= 2
B: Alloc= 0/900 us ( 0%), #Int= 0, #Iso= 0
D: Ver= 1.10 Cls=09(hub ) Sub=00 Prot=00 MxPS=64 #Cfgs= 1
P: Vendor=1d6b ProdID=0001 Rev= 2.06
S: Manufacturer=Linux 2.6.28-18-generic uhci_hcd
S: Product=UHCI Host Controller
S: SerialNumber=0000:00:10.1
C:* #Ifs= 1 Cfg#= 1 Atr=e0 MxPwr= 0mA
I:* If#= 0 Alt= 0 #EPs= 1 Cls=09(hub ) Sub=00 Prot=00 Driver=hub
E: Ad=81(I) Atr=03(Int.) MxPS= 2 Ivl=255ms

T: Bus=02 Lev=00 Prnt=00 Port=00 Cnt=00 Dev#= 1 Spd=12 MxCh= 2
B: Alloc= 34/900 us ( 4%), #Int= 3, #Iso= 0
D: Ver= 1.10 Cls=09(hub ) Sub=00 Prot=00 MxPS=64 #Cfgs= 1
P: Vendor=1d6b ProdID=0001 Rev= 2.06
S: Manufacturer=Linux 2.6.28-18-generic uhci_hcd
S: Product=UHCI Host Controller
S: SerialNumber=0000:00:10.0
C:* #Ifs= 1 Cfg#= 1 Atr=e0 MxPwr= 0mA
I:* If#= 0 Alt= 0 #EPs= 1 Cls=09(hub ) Sub=00 Prot=00 Driver=hub
E: Ad=81(I) Atr=03(Int.) MxPS= 2 Ivl=255ms

T: Bus=02 Lev=01 Prnt=01 Port=00 Cnt=01 Dev#= 2 Spd=1.5 MxCh= 0
D: Ver= 1.10 Cls=00(>ifc ) Sub=00 Prot=00 MxPS= 8 #Cfgs= 1
P: Vendor=13ba ProdID=0017 Rev= 0.01
S: Product=Generic USB K/B
C:* #Ifs= 2 Cfg#= 1 Atr=a0 MxPwr=100mA
I:* If#= 0 Alt= 0 #EPs= 1 Cls=03(HID ) Sub=01 Prot=01 Driver=usbhid
E: Ad=81(I) Atr=03(Int.) MxPS= 8 Ivl=24ms
I:* If#= 1 Alt= 0 #EPs= 1 Cls=03(HID ) Sub=01 Prot=02 Driver=usbhid
E: Ad=82(I) Atr=03(Int.) MxPS= 5 Ivl=10ms

T: Bus=02 Lev=01 Prnt=01 Port=01 Cnt=02 Dev#= 3 Spd=1.5 MxCh= 0
D: Ver= 1.10 Cls=00(>ifc ) Sub=00 Prot=00 MxPS= 8 #Cfgs= 1
P: Vendor=04d9 ProdID=0499 Rev= 2.90
C:* #Ifs= 1 Cfg#= 1 Atr=a0 MxPwr=100mA
I:* If#= 0 Alt= 0 #EPs= 1 Cls=03(HID ) Sub=01 Prot=02 Driver=usbhid
E: Ad=81(I) Atr=03(Int.) MxPS= 8 Ivl=10ms

T: Bus=01 Lev=00 Prnt=00 Port=00 Cnt=00 Dev#= 1 Spd=480 MxCh= 8
B: Alloc= 0/800 us ( 0%), #Int= 0, #Iso= 0
D: Ver= 2.00 Cls=09(hub ) Sub=00 Prot=00 MxPS=64 #Cfgs= 1
P: Vendor=1d6b ProdID=0002 Rev= 2.06
S: Manufacturer=Linux 2.6.28-18-generic ehci_hcd
S: Product=EHCI Host Controller
S: SerialNumber=0000:00:10.4
C:* #Ifs= 1 Cfg#= 1 Atr=e0 MxPwr= 0mA
I:* If#= 0 Alt= 0 #EPs= 1 Cls=09(hub ) Sub=00 Prot=00 Driver=hub
E: Ad=81(I) Atr=03(Int.) MxPS= 4 Ivl=256ms

2010年6月3日 星期四

在linux 下使用rdesktop連線windows 遠端桌面

在ubuntu中可以使用內建的圖形化介面:tsclient
不過他預設的解析度只有固定幾個,無法改變
(就直接修改tsclient存下來的設定檔,也只會跳到最接近的選項)

所以可以使用rdesktop指令:
rdesktop -u cyl -p passwd -g 1280x1000 -a 24 192.168.0.XXX -x nr


rdesktop: A Remote Desktop Protocol client.
Version 1.6.0. Copyright (C) 1999-2008 Matthew Chapman.
See http://www.rdesktop.org/ for more information.

Usage: rdesktop [options] server[:port]
-u: user name
-d: domain
-s: shell
-c: working directory
-p: password (- to prompt)
-n: client hostname
-k: keyboard layout on server (en-us, de, sv, etc.)
-g: desktop geometry (WxH)
-f: full-screen mode
-b: force bitmap updates
-L: local codepage
-A: enable SeamlessRDP mode
-B: use BackingStore of X-server (if available)
-e: disable encryption (French TS)
-E: disable encryption from client to server
-m: do not send motion events
-C: use private colour map
-D: hide window manager decorations
-K: keep window manager key bindings
-S: caption button size (single application mode)
-T: window title
-N: enable numlock syncronization
-X: embed into another window with a given id.
-a: connection colour depth
-z: enable rdp compression
-x: RDP5 experience (m[odem 28.8], b[roadband], l[an] or hex nr.)
-P: use persistent bitmap caching
-r: enable specified device redirection (this flag can be repeated)
'-r comport:COM1=/dev/ttyS0': enable serial redirection of /dev/ttyS0 to COM1
or COM1=/dev/ttyS0,COM2=/dev/ttyS1
'-r disk:floppy=/mnt/floppy': enable redirection of /mnt/floppy to 'floppy' share
or 'floppy=/mnt/floppy,cdrom=/mnt/cdrom'
'-r clientname=': Set the client name displayed
for redirected disks
'-r lptport:LPT1=/dev/lp0': enable parallel redirection of /dev/lp0 to LPT1
or LPT1=/dev/lp0,LPT2=/dev/lp1
'-r printer:mydeskjet': enable printer redirection
or mydeskjet="HP LaserJet IIIP" to enter server driver as well
'-r sound:[local[:driver[:device]]|off|remote]': enable sound redirection
remote would leave sound on server
available drivers for 'local':
alsa: ALSA output driver, default device: default
oss: OSS output driver, default device: /dev/dsp or $AUDIODEV
'-r clipboard:[off|PRIMARYCLIPBOARD|CLIPBOARD]': enable clipboard
redirection.
'PRIMARYCLIPBOARD' looks at both PRIMARY and CLIPBOARD
when sending data to server.
'CLIPBOARD' looks at only CLIPBOARD.
-0: attach to console
-4: use RDP version 4
-5: use RDP version 5 (default)
-y: use raw keyboard (default no)

2010年6月2日 星期三

簡易連線uart的程式

本來是想要把minicom搬到android上,不過他的source code很多,也蠻複雜的,
後來在網路上找到tick_minicom,只有幾個檔案,應該很容易讓他編進android

tick_minicom:簡單的uart程式
http://linuxocarina.blogspot.com/2007/09/minicom.html

不過我的連線設定跟他不一樣,所以參考以下網站對程式做了一些修改之後就可以使用了
http://book.51cto.com/art/200711/59758.htm


int
set_baud (int fd, int rate)
{
int i, rt;

u_int32_t bd = 0;

struct termios ti;

//select baudrate
for (i = 0; i < ARRAY_SIZE (bdrts); i++) {
if (bdrts[i].bps == rate) {
bd = bdrts[i].b;
debug("select baudrate: %d\n",rate);
break;
}
}
if (bd == 0) {
error ("Cannot set Baud Rate!!\n");
return -1;
}

//set baudrate
rt = tcgetattr (fd, &ti);
if (rt < 0) {
error ("Cannot get attr i=%d\n", rt);
return rt;
}

debug ("Open uart input with speed %d\n", bdrts[i].bps);
//rt = cfsetispeed (&ti, B0);
rt = cfsetispeed (&ti, bd);
if (rt < 0) {
//error ("Cannot set input baud to B0!!\n");
error ("Cannot set input baud to bd!!\n");
return rt;
}

debug ("Open uart output with speed %d\n", bdrts[i].bps);
rt = cfsetospeed (&ti, bd);
if (rt < 0) {
error ("Cannot set baud rate %d\n", bdrts[i].bps);
return rt;
}

rt=tcsetattr (fd, 0, &ti);
if(rt<0){
return rt;
}

//set no hareware conrtol
rt = tcgetattr (fd, &ti);
//ti.c_cflag |= CRTSCTS; // hardware control
ti.c_cflag &= ~CRTSCTS; // no hardware control
rt=tcsetattr (fd, 0, &ti);
if(rt<0){
return rt;
}


//set databit:8
rt = tcgetattr (fd, &ti);
ti.c_cflag&=~CSIZE;
ti.c_cflag |=CS8;
rt=tcsetattr (fd, 0, &ti);
if(rt<0){
return rt;
}


//set no parity bit
rt = tcgetattr (fd, &ti);
ti.c_cflag &= ~PARENB;
rt=tcsetattr (fd, 0, &ti);
if(rt<0){
return rt;
}


return rt;
}

解決ubuntu 10.04 中minicom放大到全螢幕會閃爍的問題

參考 http://blog.xuite.net/yctseng/notes/26134176

使用:
alias minicom='TERM=linux /usr/bin/minicom'


2010年5月31日 星期一

使用shell script計算CPU使用率

PROGRAM_NAME --程式名稱
DELAY ---------每隔多久看一次CPU usage
NUMBER --------總共看幾次


取得系統CPU使用率:
top -b -n NUMBER -d DELAY | tee top.log
cat top.log | grep CPU: | awk '{print $8}' | sed s/%//g

若要查看某程式的cpu使用率
cat top.log | grep -v grep | grep PROGRAM_NAME | awk '{print $7}'| sed s/%//g


example:
假設要看hello程式, 一分鐘內每隔一秒的CPU使用率:

top -b -n 60 -d 1 | grep -v grep | grep hello | awk '{print $7}'| sed s/%//g
輸出結果:
0
9
5
2
1
2
2
2
4
2
2
3
3
1
2
3
2
3
2
0
.....

2010年5月30日 星期日

腳踏車變速器/剎車調整

我是用:
SHIMANO TY-22中變速器
SHIMANO TOURNEY TX-31 FOR 21SPEED 後變速器
SHIMANO EF50上下按鍵式變把
SHIMANO MFTZ21 7速飛輪

中變:
1.在把手上有微調旋鈕,先調整至在中間那一檔能夠順利
往上下檔位切換
2.調整high/low螺絲限制最高與最低檔位的位置
至適當距離


後變:
1.微調旋鈕在後變上,調整至後變中間幾個檔位切換順暢
2.調整high/low螺絲限制後變最高與最低檔位的
位置至適當距離


剎車:
1.調整變速器上的微調旋鈕使剎車按壓的距離至適當位置
2.調整V型剎車組的彈簧微調螺絲使得兩邊彈力差不多,
剎車皮與輪圈之間距離相同

在linux下使用LFTP多點下載

參考 http://yurinfore.blogspot.com/2009/10/linux.html

改成可以控制下載thread數量
function pget()
{
thread=5

case $# in
1)
addr=$1
;;
2)
thread=$1
addr=$2
;;
*)
echo "usage:"
echo "pget [URL] (default thread:5)"
echo "or"
echo "pget [thread] [URL]"
exit 1
;;
esac


echo thread : $thread
echo address : $addr
cmd="pget -n $thread $addr; exit"
lftp -e "$cmd"
}

2010年5月27日 星期四

linux 上的dnw程式

由於工作機是linux,每次要燒image都要切到windows不方便,
在網路上有找到別人寫的dnw程式,不過沒有作checksum的部份,就把他補上去了

ps.
1.系統需要先安裝libusb
2.使用時vid/pid可能需要依據裝置修改

/*
* cy add checksum
* use: gcc dnw2.c -o dnw2 -lusb -g
*/

/* dnw2 linux main file. This depends on libusb.
*
* Author: Fox
* License: GPL
*
*/


#include
#include
#include
#include
#include
#include

#define QQ2440_SECBULK_IDVENDOR 0x04e8
#define QQ2440_SECBULK_IDPRODUCT 0x1234


struct usb_dev_handle * open_port()
{
struct usb_bus *busses, *bus;

usb_init();
usb_find_busses();
usb_find_devices();

busses = usb_get_busses();
for(bus=busses;bus;bus=bus->next)
{
struct usb_device *dev;
for(dev=bus->devices;dev;dev=dev->next)
{
if( QQ2440_SECBULK_IDVENDOR==dev->descriptor.idVendor
&& QQ2440_SECBULK_IDPRODUCT==dev->descriptor.idProduct)
{
printf("Target usb device found!\n");
struct usb_dev_handle *hdev = usb_open(dev);
if(!hdev)
{
perror("Cannot open device");
}
else
{
int ret;
if(ret = usb_claim_interface(hdev, 0) != 0)
{
perror("Cannot claim interface");
printf("ret=%d\n", ret);
usb_close(hdev);
hdev = NULL;
}
}
return hdev;
}
}
}
printf("Target usb device not found!\n");

return NULL;
}

void usage()
{
printf("Usage: dnw2 \n\n");
}

unsigned char* prepare_write_buf(char *filename, unsigned int *len)
{
unsigned char *write_buf = NULL;
struct stat fs;

int fd = open(filename, O_RDONLY);
if(-1==fd)
{
perror("Cannot open file");
return NULL;
}
if(-1==fstat(fd, &fs))
{
perror("Cannot get file size");
goto error;
}
write_buf = (unsigned char*)malloc(fs.st_size+10);
if(NULL==write_buf)
{
perror("malloc failed");
goto error;
}

if(fs.st_size != read(fd, write_buf+8, fs.st_size))
{
perror("Reading file failed");
goto error;
}

printf("Filename : %s\n", filename);
printf("Filesize : %x bytes\n", (int)fs.st_size);

*((u_int32_t*)write_buf) = 0xC0000000; //download address
*((u_int32_t*)write_buf+1) = fs.st_size + 10; //download size;


//cy: compute checksum
int k;
u_int16_t csum=0;
for(k=0; k<(int)fs.st_size; k++){
csum +=write_buf[8+k];
}
printf("CheckSum=%d\n",(int)csum);

write_buf[fs.st_size+ 8] = csum; //checksum;
write_buf[fs.st_size+ 9] = csum>>8; //checksum;
//printf("write_buf[%d]=%.2x\n", (int)fs.st_size + 8, write_buf[(int)fs.st_size + 8]);
//printf("write_buf[%d]=%.2x\n", (int)fs.st_size + 9, write_buf[(int)fs.st_size + 9]);


*len = fs.st_size + 10;

return write_buf;

error:
if(fd!=-1) close(fd);
if(NULL!=write_buf) free(write_buf);
fs.st_size = 0;
return NULL;
}

int main(int argc, char *argv[])
{
if(2!=argc)
{
usage();
return 1;
}

struct usb_dev_handle *hdev = open_port();
if(!hdev)
{
return 1;
}

unsigned int len = 0;
unsigned char* write_buf = prepare_write_buf(argv[1], &len);
if(NULL==write_buf) return 1;

unsigned int remain = len;
unsigned int towrite;
printf("Writing data ...\n");
while(remain)
{
towrite = remain>512 ? 512 : remain;
if(towrite != usb_bulk_write(hdev, 0x2, write_buf+(len-remain), towrite, 3000))
{
perror("usb_bulk_write failed");
break;
}
remain-=towrite;
printf("\r%d%%\t %d bytes ", (len-remain)*100/len, len-remain);
fflush(stdout);
}
if(0==remain) printf("Done!\n");
return 0;
}